This is a 2010-to-2013 archive of toki-woki.net. Here's how it looks now.

Okr – Story of a failure

Some projects become real, others never see the light of day. This one is more of an abortion.

Six month ago I’ve been contacted by an architectural firm to provide some consulting on a project of theirs (I’m not going to name names, you’ll understand why). The goal was to find ideas to make a building’s front more interesting. The building being a place to help and promote Hip-Hop culture.

So I started working on it and came up with ideas and concepts. The architect I was in contact with seemed pretty happy with it and everything was looking good.

Until I no longer received any answer to my e-mails… Our last interaction is now 5 month old and I think time has come to mourn. What I came up with can be interesting and since it involves an OpenSource project, here are a few bits about it.

At that time I was discovering  GML (Graffiti Markup Language) and Evan Roth‘s work. Bordeaux hosted Les Grandes Traversées and all of this really inspired me. So I thought of a mash-up between GML’s #000000book (black book, open archive of GML tags), a player of my own (Okr), the building itself and Twitter. Here’s the document I presented to explain what I had in mind.
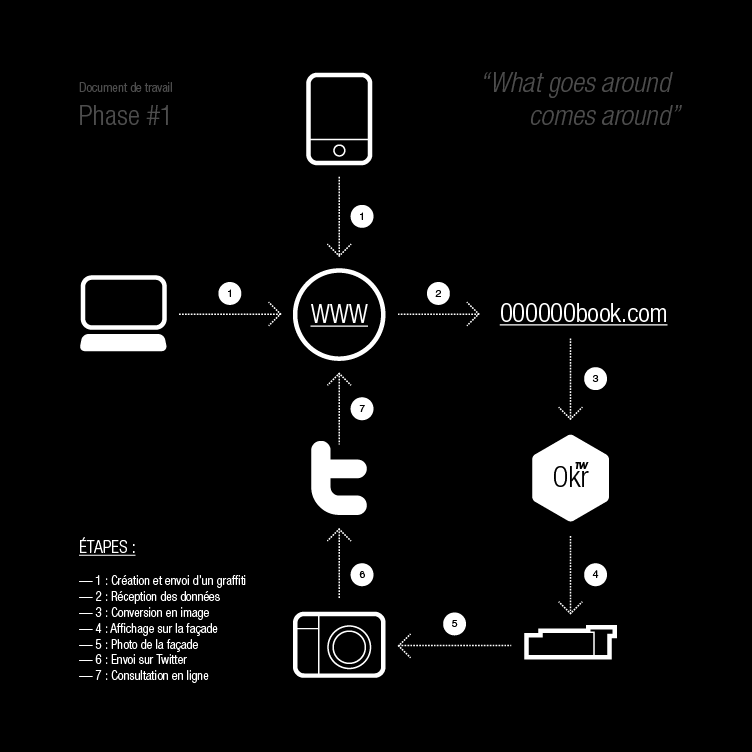
The steps are:

  1. Creating and sending a graffiti;
  2. Receiving data;
  3. Converting it to an image;
  4. Projecting it on the building’s front;
  5. Photo-shooting of the front;
  6. Sending to Twitter;
  7. Online consultation.

After a few e-mails with Jamie Wilkinson (heads up!) I started working on the core classes writing GMLPlayer and GMLCreator. The goal was to provide both a way to display tags and to create/upload them. I then built a UI around all that (a Flex one, after noticing Minimal Comps didn’t work the way I expected).

[iframe src=”http://toki-woki.net/p/Okr/” width=”752″ height=”506″]

Note: you’ll also find the app on its dedicated page. Try searching for “dasp” or “hello world” for example and play with the settings (the 3 top sliders).

Unfortunately it is only after creating all this that I realized the project would never become real… So I simply stopped working on it. I am well aware that some parts of the code is a bit raw and could be optimized and I haven’t built the creation/upload feature into the UI yet. Don’t know if I will, but the project is OpenSource so feel free to give it a spin! I also share my initial attempt and a pixel version in case you’re interested.

Pretty happy that — even if not feature complete — Okr made it to the GML project gallery, yay!

And just because a project will never see the light of day doesn’t mean it doesn’t need a proper logo, right?

A Golden Ratio Tool

[iframe src=”http://toki-woki.net/p/golden-ratio/”]

I wrote a quick and simple golden ratio tool (dedicated page). Basically it helps you find “golden ratio neighbors” for a given number: every number in the list divided/multiplied by its neighbor = φ.

Pretty straightforward but could come in handy. I’m aware it could be improved; if you have suggestions…

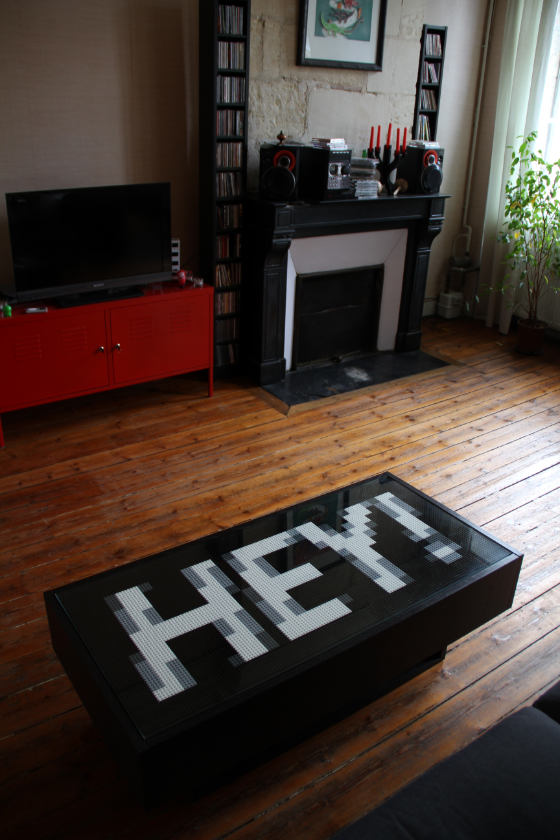
Hey! – A Lego Table

When I moved in I bought an IKEA Ramvik table and while travelling this summer I had an idea (don’t ask why): decorate its top with Lego bricks used as pixels. Here are the steps I went through. If you don’t care about those steps and want to see a nice time-lapse video, scroll to the end of the article!

Lego bricks

First things first. What are the Lego brick sizes and colors available? Oddly enough this question is not that easily answered. Probably because Lego’s site is crappy, or because nobody really cares… I eventually found Brickipedia which happens to be a much richer resource than the official ones. Everything I was looking for was there: the Lego “unit” is 8 millimeters and the color palette is pretty simple.

Table specs

Knowing my table size I had various options, depending on the “pixel size” I’d choose. Of course the number of bricks (and the price) would also vary. So I created a dynamic spreadsheet on Google Docs that’d do the calculations for me… Here it is, with all the options possible (French, sorry).

[iframe src=”https://spreadsheets.google.com/pub?key=0AmyvU-n2aOBpdG5oNUN6UW0xcUJ4a2E3eXFrTTJIVnc&hl=en&output=html&widget=true” height=”374″]

I chose the 4×4 option, quite cheap and still offering a cool number of pixels.

Design

36×16 pixels of freedom, that’s it. I tried lots of different designs, from lo-fi photos to pixel-art drawings. I decided to go for a Heavy Oblique Futura.

Actual size:

Looking good.

The Lego palette

I set my type to white, on a black background. The anti-aliasing process creates gray-scale pixels to smooth the curves, which is great, but Lego bricks aren’t available in all colors! To have a realistic preview of what it would look like I had to create a Photoshop Color Table matching Lego’s gray-scales (if you’re interested, just ping me [UPDATE: here they are]). Here’s a comparison between Photoshop’s default gray-scales (left) and Lego’s palette (right):


You may notice that Lego’s black is a little bit light and the grays are yellowish.

Time to order bricks!

Already? Nope, not that fast. Before ordering I had to know exactly what to order, that means counting the pixels. Well, I’m not this kind of guy. I’m a developer; I hate repetitive chores, you know.

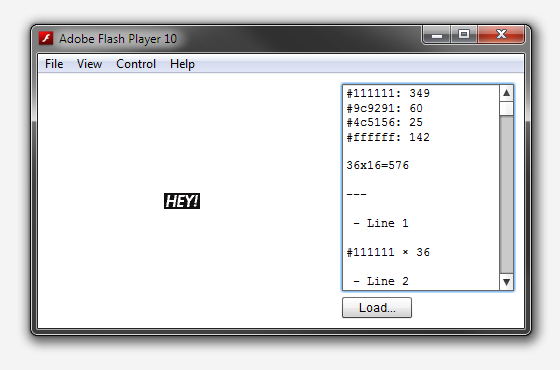
So I fired up Flash Builder and came up with PaletteCounter a simple, OpenSource, app to count pixels of each color. I also added some kind of “assembly instructions generator” to help us build it. Handy.

Time to order!

Really? Yup. I placed an order on lego.com’s Pick A Brick and received it a couple of weeks later. Yay!

Let’s do this

I’m not going to describe the process (that happened this saturday), just have a look at this time-lapse vid. 1020 pics shot in about an hour, yummy. Thanks to Céline and Julie for helping out!

[vimeo id=”16376065″ height=”374″]

This page has been translated in Russian by Karina.