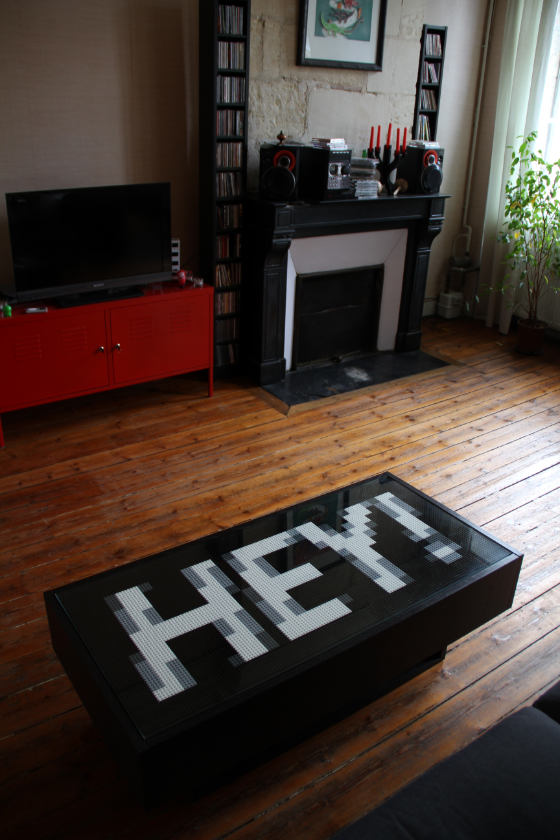
When I moved in I bought an IKEA Ramvik table and while travelling this summer I had an idea (don’t ask why): decorate its top with Lego bricks used as pixels. Here are the steps I went through. If you don’t care about those steps and want to see a nice time-lapse video, scroll to the end of the article!
Lego bricks
First things first. What are the Lego brick sizes and colors available? Oddly enough this question is not that easily answered. Probably because Lego’s site is crappy, or because nobody really cares… I eventually found Brickipedia which happens to be a much richer resource than the official ones. Everything I was looking for was there: the Lego “unit” is 8 millimeters and the color palette is pretty simple.
Table specs
Knowing my table size I had various options, depending on the “pixel size” I’d choose. Of course the number of bricks (and the price) would also vary. So I created a dynamic spreadsheet on Google Docs that’d do the calculations for me… Here it is, with all the options possible (French, sorry).
[iframe src=”https://spreadsheets.google.com/pub?key=0AmyvU-n2aOBpdG5oNUN6UW0xcUJ4a2E3eXFrTTJIVnc&hl=en&output=html&widget=true” height=”374″]
I chose the 4×4 option, quite cheap and still offering a cool number of pixels.
Design
36×16 pixels of freedom, that’s it. I tried lots of different designs, from lo-fi photos to pixel-art drawings. I decided to go for a Heavy Oblique Futura.
Actual size:
![]()
Looking good.
The Lego palette
I set my type to white, on a black background. The anti-aliasing process creates gray-scale pixels to smooth the curves, which is great, but Lego bricks aren’t available in all colors! To have a realistic preview of what it would look like I had to create a Photoshop Color Table matching Lego’s gray-scales (if you’re interested, just ping me [UPDATE: here they are]). Here’s a comparison between Photoshop’s default gray-scales (left) and Lego’s palette (right):

You may notice that Lego’s black is a little bit light and the grays are yellowish.
Time to order bricks!
Already? Nope, not that fast. Before ordering I had to know exactly what to order, that means counting the pixels. Well, I’m not this kind of guy. I’m a developer; I hate repetitive chores, you know.
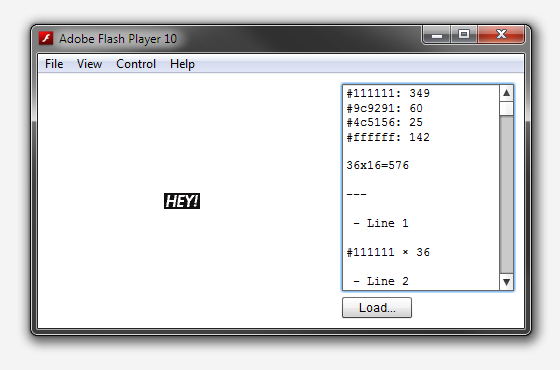
So I fired up Flash Builder and came up with PaletteCounter a simple, OpenSource, app to count pixels of each color. I also added some kind of “assembly instructions generator” to help us build it. Handy.

Time to order!
Really? Yup. I placed an order on lego.com’s Pick A Brick and received it a couple of weeks later. Yay!
Let’s do this
I’m not going to describe the process (that happened this saturday), just have a look at this time-lapse vid. 1020 pics shot in about an hour, yummy. Thanks to Céline and Julie for helping out!
[vimeo id=”16376065″ height=”374″]
This page has been translated in Russian by Karina.
It’s just awesome.
Well done, you get ‘coolest thing I found on the web today award’ – not just for the table idea, but for the accompanying geekery and super-clear description and links. And yes, I would love the PS/lego color tables! This is one of those things I have thought about doing but never quite got round to – thanks in advance for the info (oh, and also for your cool screenshot app – http://toki-woki.net/p/WebKut/ )! Merry Christmas!
Who would have thought the little Lego could be all this? so very cool… I wonder were all my son’s Lego’s went? But that was over 30 years ago…
Just added links to a live version of PaletteCounter and to the ACT (Adobe Color Table) files!
Totally awesome- much respect for the idea and implementation! How much did this cost you in lego bricks though??
I chose the 4×4 option, so it cost me around 90€. I also ordered some extra bricks just to be sure!
Woo- thanks for the fast reply- I’m going get my design chops out and starting shopping now!
Thanks! :-)
Anyone wanting to take on a similar project should check out Bricklink.com. Individual sellers with a much better selection of parts and colors than Lego’s own Pick-a-Brick. And usually at cheaper prices too. They can be very knowledgable too, with help and links for creating mosaics, etc.
Project featured in some of the coolest sites:
What a fantastic idea! I am so tempted to try this out now :)
Could I also ask what song you used for your video?
Thanks! The track I used is called Vordhosbn, by Aphex Twin and it’s on Drukqs!
Hey! Fantastic idea! I have some questions about the coffee table. How much vertical space is there between the top panel and the glass? Thanks!
Thanks! Well I can’t really answer since I now have the Lego layer in between… But if you remove the 4 little bumpers at the corners (which I did) and put the Lego layer between the table top and the glass, the glass will be around one millimeter above the table’s frame (something you don’t really notice but is worth mentioning).
I remember measuring all this when I was planning the project but can’t find my notes anymore, sorry…
I hope this helps!
Thanks, this is helpful! I was thinking it might be interesting to try using two layers of bricks (probably using flat bricks).
Since there aren’t any regular Lego bricks in the 4×4 dimension i’m pretty sure he used flat ones -> Plates.
You’re absolutely right! I didn’t specify it, but yes, I used plates!
This is a really cool idea, though I’d be interested in trying out other Lego designs in the tabls.
Really cool, I’m glad you had the sense to put that glass on top of the lego “skin”. cleaning dust of that would be a pain :d
Ah, bien je ne connaissais pas tout ça, bien joué pour la table ! à demain du coup.
Merci beaucoup pour toutes les infos que vous avez donné ! En particulier les palettes de couleurs :)
Je me suis enfin décidé à faire la mienne : http://tumblr.yojimbo.fr/post/8002311550/finiiiiiiii-jadore
Par contre je ne me suis pas limité à des pièces de 4×4, je suis parti sur une base de 1 pixel = 2×2, mais en réunissant pour chercher les pièces ayant le meilleur ratio pris/pixel. Cela m’a permis de bien réduire le prix final, mais j’ai rencontré un petit inconvénient: certaines pièces n’ont pas des dimension parfaitement proportionnelles, résultat, j’ai du en limer quelques unes et laisser du jeu par endroits.
Je suis vraiment très content du résultat, merci beaucoup pour cette idée.
Great work sir! Thinking of biting your style but maybe trying “YO!” instead.
Why had you put a plastic film under the lego bricks ?
What kind of film had you used ?
How do you prevent brick from moving ?
Great job !
Thanks!
The plastic film is cover film (for books) and I use it to glue all Lego bricks together. I guess this answers all your questions!
Thx a lot !
What’s it like to clean, between all the lego round heads?
Never had to it since I kept the glass part on top of it!
It would be a lot more work, but you could come up with some sort of “best fit” algorithm that would allow for the larger plates in areas of solid color, and then working down to the 1×1 (or 1×4 strips, etc.) for the edges. This would give a higher “resolution” look to the table. You could even do this as an upgrade to the existing table by re-rendering it at the higher resolution, and creating a list of 4×4 tiles that you’d need to replace with smaller pieces.
brilliant, love the idea & how you’ve done it.
Will definatley have to attempt something like this
14 Trackbacks