While redesigning this blog I wanted to keep the “one color per post” concept I had in the previous version by changing (tweening) the logo’s color accordingly to the article being viewed (or scrolled to). I rapidly realized I couldn’t achieve this with just HTML+CS+JS and I didn’t want to use Flash (mainly because of iOS devices but also to avoid loading a SWF file on every page).
I remembered hearing — a few months earlier — about Raphaël (a JS lib to render vector graphics). At that time I found the concept really interesting but couldn’t see where to use it.
OK, so I know what I want to do, I know the tools I’ll use, but how do we do that? Raphaël is cool, but its syntax looks a bit cryptic at first. It says it handles SVG, and — guess what — Illustrator can export to SVG. We’re getting closer…
SVG is XML, but Raphaël doesn’t eat XML, it eats a specific syntax meant to be compatible with SVG and VML. Hum… This is when I fire Flash Builder and start writing code. The goal: accept an SVG XML file as input and spit some “Raphaël-compatible script” out.
Boom (plus a little demo of an output).
I then simply had to export my Ai logo to SVG, open it in SVG2RaphaelJS, copy paste the output, and wire all that to the scroll/color tweening logic. Pretty easy.
Everything worked and looked nice on all browsers and OS’s but I realized the sole idea of having a logo changing colors didn’t work that well. For purely visual reasons. So I dropped it from my theme and rolled back to the black PNG version you can see right now.
The good thing is, the tool works pretty well (at least with Illustrator SVGs) and is OpenSource. Either use it or modify it, and tell me what you think. I did this in a hasty fashion and I probably won’t use it a lot, so don’t expect updates or bug fixes… But if you feel like improving it, please do so!
Guess what? AIR app! This one’s for eduMedia.
An intro
We create and distribute pedagogical simulations and videos, and our school users can download them to prepare and illustrate their lessons. Until now we offered server-side generated ZIP files with an HTML, some CSS and the SWF, but users (who often are not computer geeks) wanted something simpler and more powerful… So we designed the eBox!
The eBox
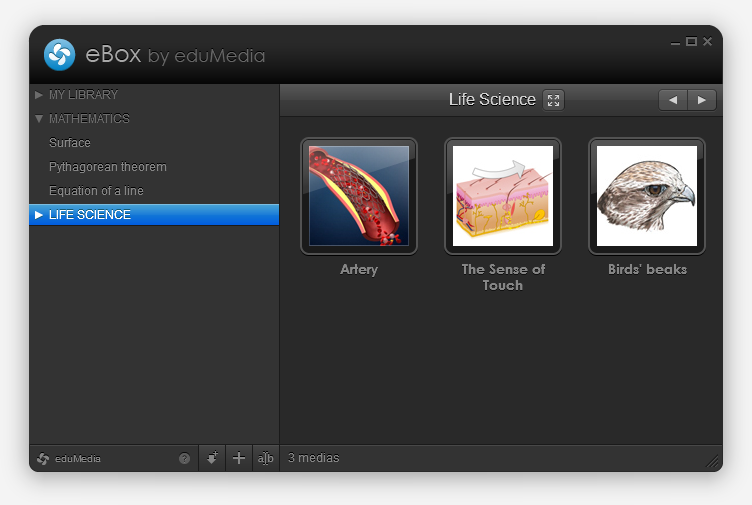
Basically the eBox is an empty media library waiting to be filled. The first time you launch it, it installs itself (and the AIR runtime, if not already there) and then fills itself with the medias you chose. This happens thanks to AIR’s BrowserInvoke logic and removes the “Save As” and “Uncompress” steps.

You can also fill it with “local medias” (of any type) but dragging and dropping files on it, or by browsing and selecting them. If these medias are SWFs they’ll be opened within the app, if not the OS will open them with their default app. Handy.
You also have the ability to create directories to organize your library, and to reorder medias (via drag and drop). Pretty common, but cool.
Let’s talk tech
Flex 4.1, localized with Lupo (now free and OpenSource!) and designed with Illustrator. Server-side communication is made through AMFPHP. I used some tiny techniques that helped deploy two different versions with only one project (we have a school and an individual version), I might detail that in a next post.
This is my first real-life project with Robotlegs, it helped me learn how to use it and how to write really clean code; with view, mediators and all. I loved it and think I will continue building big projects with RLs, makes you feel pretty.
So?
I’m pretty happy with the final result (not that final, expect updates!), both on visual and technical points of view. Go grab a free media and tell me what you think! We also set up a special page with a nice presentation of how it works, in case you’re lost.
